Tunneling iTunes through SSH

If you want to listen to your music library on the go, you can tunnel iTunes through SSH in a few easy steps.

First of all, you have to enable sharing in iTunes: iTunes > Preferences > Sharing > Share my library on my local network.

This will announce your library on your local network using multicast DNS, provided by Apple’s implementation of zeroconf: Bonjour. The library can then be accessed on port 3689 of the computer mDNS announced.

Hence, to access your local library on a distant network, we will implement two things: ssh tunneling of port 3689 for the data to be transmitted, and mDNS announcement of the library on the new network so iTunes is aware of where to get it.

We will assume:
– local = where me & my laptop are
– remote = where iTunes is (=server).

Tunneling port 3689

We will tunnel port 3689 of the remote computer to a port of your choice on your local computer:

ssh -N florent@myServer -L 3690:localhost:3689 -f

-L is the standard syntax for SSH tunneling. man ssh tells us the three arguments stands for port:host:hostport; as in “send data received at my own port to the hostport of said host“. Here for example, it means: tunnel all data received on my port 3690 to this SSH connection’s localhost (myServer) on its port 3689.

Feel free to change 3690 to the port of your choice, replace florent@myServer by your own login/host combination, and add a -p if you use a non-standard port for SSH (which is a Good Thing(tm)!).

The -f argument means the SSH tunnel will stay in the background. Finally, -N tells SSH not to execute a command on the remote side (i.e. launch a terminal on the server), meaning we will only use this connection to forward data.

Announcing the library

We will use this command to declare the new library:

dns-sd -P iTunesServer _daap._tcp local 3690 localhost.local 127.0.0.1 &

This command sets up a DNS proxy (-P) called iTunesServer, retransmitting DAAP announcements, on the local domain, on port 3690 of host localhost.local (at address 127.0.0.1).

You should get the following output from dns-sd:

 Registering Service iTunesServer._daap._tcp.local host localhost.local port 3690
 0:24:30.140  Got a reply for service iTunesServer._daap._tcp.local.: Name now registered and active
 0:24:30.140  Got a reply for record localhost.local: Name now registered and active

Note that this will only advertise the library on your own computer. If you want other computers on your network to see the library you’re tunneling to, use the following command, where ComputerName is the Bonjour name of your computer (set in System Preferences > Sharing > Computer Name):

dns-sd -P iTunesServer _daap._tcp . 3690 ComputerName.local ComputerName.local &

Annd your library will show up in iTunes!
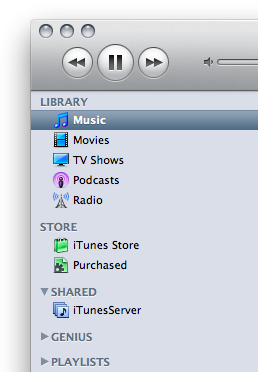
iTunes shows the remote library
Victory!

Playback can be a bit choppy if your server’s upload or laptop’s download is low, but it usually should be okay – MP3 and AAC yields great results around 192 to 320 kbps, equivalent to an average 25 to 40 kB/s transfer rate.

Note that this method also allows you to use a password (set up in iTunes) to protect your shared libraries.
Slim down applications: Trimmit

Applications on Mac OS typically include a lot of stuff most people won’t use daily, especially translations in foreign languages and builds for different architectures (x86, x86_64, PPC and PPC 64 bits).

A handful of utilities exist to trim down applications. I personally use Trimmit, a free-as-in-beer software that gives excellent results, as long as it’s used carefully.

For example, let’s take the latest version of iTunes (v9.1) under Snow Leopard.

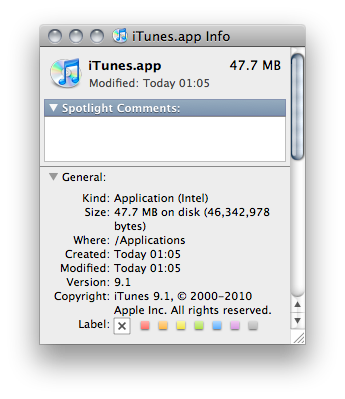
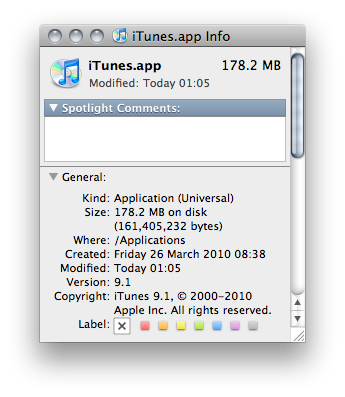
This is the default install:
iTunes - Original size

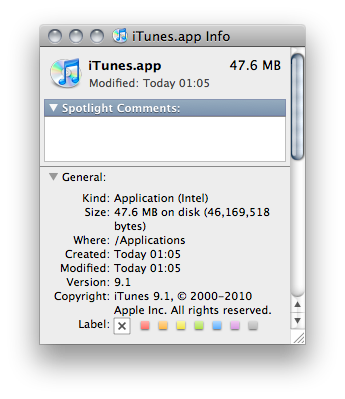
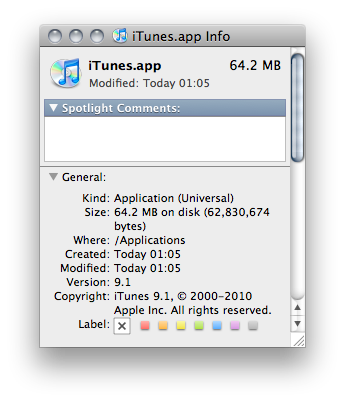
A simple cleanup of foreign languages and compression of TIFF files shrinks iTunes into this more reasonable app:
iTunes - Cleared languages and tiff
Trimmit already cut iTunes size by nearly two thirds (!), and iTunes works flawlessly.

That’s about the best results I’ve had with Trimmit, because things get ugly if you want to squeeze it too far.

Still want to push things more? Okay, let’s keep only the x86 binaries:
iTunes - cleared architecture

That’s another 17MB trimmed… But this manipulation breaks iTunes code signature. Which will -if you run OS X firewall, like everyone should- trigger a message asking you if you want to allow iTunes to connect to Internet each time you run it.

Still seem a bit big? Well let’s check every option in Trimmit and go for it.
iTunes - Complete cleanup

That’s 100kB more freed, but now iTunes crashes at startup. Seems that “useless files” aren’t that useless after all.

It’s important to keep in mind that Trimmit doesn’t work well with any applications.

You should be particularly careful (read: do not try) with Adobe applications and other applications on the blacklist. But overall, the extra space can be a very good thing, especially on small partitions and/or on SSDs.

Changing an application icon under OS X

I don’t like the default icon for Preview.app in OS X.

The sight of that child, giving me this creepy grin, sitting here in the Dock while I’m browsing pictures, is just weird.

Icon for preview.app
Seriously!

There are two ways to make him go away.

The hard way

I call this method the hard way because it involves having another .icns file (the filetype for OS X icons), and navigating through folders supposed to be hidden. But it doesn’t matter, you’re a hardcore user!

Right-click Preview.app and click “Show Package Contents”.
Navigate to Contents/Resources.
Replace Preview.icns with the icon of your choice.

The easy way

This method allows you to replace an icon with another application’s icon.

Open the information panel of said other application (Cmd+i in the Finder).
Click on the big icon at top-left (not the one in the menu bar).
It will appear highlighted:
The information panel with an highlighted icon

Enter Cmd+c to copy it.

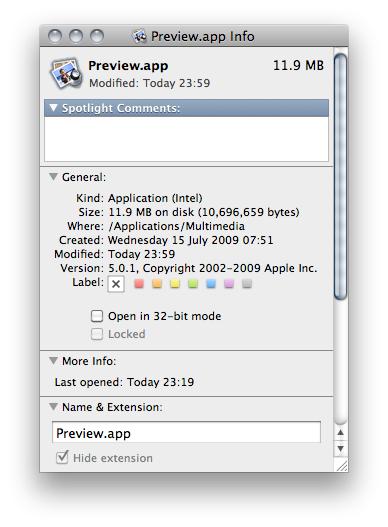
Open Preview.app’s information panel.
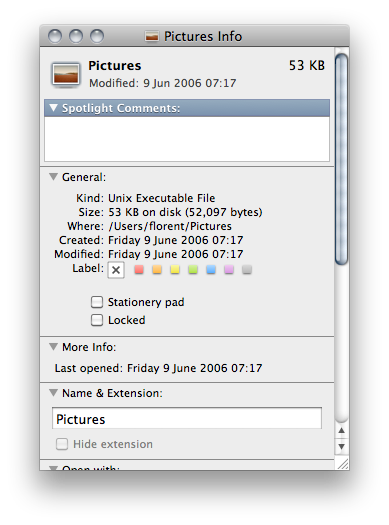
Click on the icon:
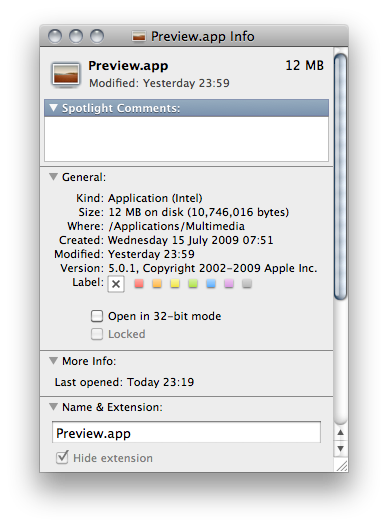
Preview.app's information panel before changing the icon
Enter Cmd+v.

Voilà!
Preview.app's information panel after changing the icon

Another advantage of this second method is that it also works for disks, folders, and about any file.

You can find a lot of great icons at InterfaceLift (though it doesn’t seem to be updated very often). The icon I used to replace the child is part of the Aqua Neue set.

Seitunes v0.8

Version 0.8 of Seitunes is here!

Apart from finishing implementing the core functions, I focused on code clarity and performance enhancements.

Code

All major Applescript interactions with iTunes now go through separate C functions instead of “oh hey just do it here in main()” as before. These functions act as wrappers to access iTunes, and can be re-used for any other project. I could even put them in a separate file and call it a library :)

Performance

Seitunes used to refresh data (artist, song, volume, shuffle, playlist) all the time, with Applescript, to get data directly from iTunes itself. I reduced the number of interactions and reduced the calls to iTunes.
For example, the “+” key used to tell iTunes to increase the volume, then call Applescript to refresh all data, including the new Volume value. Now it just tell iTunes to increase Volume, computes the new Volume value to display and goes along with it.
I kept refresh mandatory for the iTunes status in case anything goes wrong (playlist ended, etc).
Refresh is also forced when changing songs – obviously we don’t want to wait 3 seconds to see the song we just changed.

Of course it creates a problem when a song ends by itself. If we never refresh automatically, we can’t display up-to-date data.
I solved this by adding a “decay” counter that forces a refresh if the data is more than 3 seconds old.

All of this seem to have a positive effect: Seitunes now feels as snappy and reactive as directly using iTunes.

New features

> Quit iTunes
> Toggle shuffle
> Display current playlist
> Less Applescript errors (yay!)

Actually there shouldn’t be any Applescript error left (and yes that’s a feature!).

OS X 10.6.3 broke ncurses

As I was working on my Seitunes project, I noticed something strange: the arrows didn’t quite work any more. Instead of their proper action (up & down to change volume, right & left to change song), they all quit the program and printed -respectively- “OA”, “OB”, “OC” and “OD” on the stdout.

I tried to go back to a working state by progressively deleting new features I was implementing, until I had exactly the same code as the (known working!) 0.5 version, but it was still quitting. gdb told me it wasn’t a crash (“Program exited normally”).

After some testing, I noticed Seitunes worked on my laptop, but not on my MacBook Pro. The only difference between them being that my laptop was still in OS X 10.6.2, while my mbp has upgraded to 10.6.3.

After a bit of digging into curses functions, I started to suspect keypad(WINDOW *, BOOL) to not work properly after the update. keypad() is supposed to dictate whether getch() should interpret an arrow as one non-ASCII value (with the boolean argument set to TRUE) or a set of ASCII values beginning by the escape char, a.k.a. 27 (FALSE). I explicitly call keypad(stdscr, TRUE) in Seitunes, but the FALSE state would perfectly explain the quit-then-print-two-chars behaviour I had was having: I use the escape character to quit Seitunes.

I wrote two very simple pieces of code -one for keypad true, one for keypad false- that plainly outputs the value returned by getch(). They look like:

#include <curses.h>

int main( int argc, char** argv )
{
	int key;
	initscr();
	cbreak();
	noecho();
	nonl();
	intrflush(stdscr, FALSE);
	keypad(stdscr, TRUE);
	printw("getch() should produce only one value when hitting an arrow.\n");
	while ( (key = getch() ) != 'q' ) {
		printw("You entered key %d\n", key);	
	}
	endwin();
	return 0;
}

Code and makefile available here (testCurses.zip) if you want to give it a try.

Under both OS X 10.6.2 and Linux Mint 6 “Felicia” (based on Ubuntu 8.10), these programs behave as they’re supposed to: when keypad is TRUE, an arrow is shown as a single value; when FALSE, an arrow becomes a set of values.

Under OS X 10.6.3, these two programs behave the same way. Both output several values for an arrow.

I filed a bug report to Apple (vintage interface by the way!).

While this bug is present, we’ll have to manually parse the ASCII values for the arrows, which are mapped as follows:

Up	27 79 65	('escape' 'O' 'A')
Down	27 79 66	('escape' 'O' 'B')
Right	27 79 67	('escape' 'O' 'C')
Left	27 79 68	('escape' 'O' 'D')

Edit: these values assume OS X 10.6.3 and keypad(stdscr, TRUE), a.k.a. when the bug is present.

If you want to use keypad(stdscr, FALSE) in 10.6.3, the arrows are mapped as:

Up	27 91 65	('escape' '[' 'A')
Down	27 91 66	('escape' '[' 'B')
Right	27 91 67	('escape' '[' 'C')
Left	27 91 68	('escape' '[' 'D')

Update, March 1st: Apple answered to my bugreport (ID #7812788). They told me it was a known issue (duplicate of bug #7812932) currently being investigated by engineering.